Well since we went on our apple picking excursion and we still have more apples than I know what to do with them I thought I'd try something new.
I've always heard of apple butter...but I'd never seen it or tried it. I didn't even know what you used it for. But I mean come on...apples and butter! You can't go wrong!
But I found out soon enough that it's got no butter, just the name.
So I went online to my favorite website...Chickens in the Road and found a recipe.
So I thought I'd share it with you. I'm thinking of making more to sell at the next craft sale since nobody around here seems to make it. (That's how many apples I have left!)
Ok...First...
2 quarts apple pulp
4 cups sugar
2 teaspoons cinnamon
1/2 teaspoon cloves
With ingredients like this how can anyone go wrong?!
Start with 4 pounds of apples about 16 medium size. The recipe calls for a food mill which I don't have, but I did use my stick blender.
 |
| Cut up apples |
Peel and chop the apples. It says you can leave the peel on but I didn't dare too much since I didn't have a food mill. I left some, but not all.
It also doesn't say how to cook the apples, so I just simmered them on the stove and added a bit of water.
So bring the apples to a boil and cook till they are soft but not liquified.
At this time I pulverized them with the stick blender because
I had two different kinds of apples
and one cooked faster than the other.
 |
| After the stick blender and before I added the rest of the ingredients |
 |
| With the rest of the stuff added |
Now it's time to add the sugar, cinnamon and cloves.
Again I used the stick blender to make sure all was well incorporated (fancy word meaning mixed together).
Then you have to cook until the mixture thickens and rounds on the spoon.
I have no idea what that meant! It said it can take a couple of hours to reach this stage. So I waited and waited and waited some more.
 |
| I'm assuming this is what they mean by rounding on the spoon |
It made a horrible mess everywhere on my stove and floor since it plops even on low heat.
Finally at what I figured what the "rounds on the spoon stage I figured it was ready.
Now you have to ladle it in hot, clean jars about a 1/2" from
the top and process it in a hot water bath for
10 minutes. And I'm not talking about your bathtub either.
 |
| Yummm!!To be used on toast! |
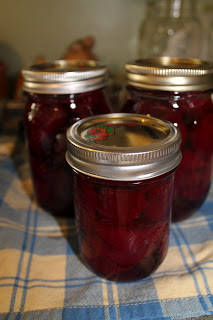
A single batch made 6 jars.
Even though it took a long time. I think it was worth it. Next time I'll just make a double or triple batch.
Hopefully I didn't miss any steps. If you've got any questions just email me.
 |
| My first batch of apple butter |
Have a Blessed Evening
Lisa


